SCREEn PRINTING
Using ink and screens to produce a design on a piece of clothing
A New design

|
|
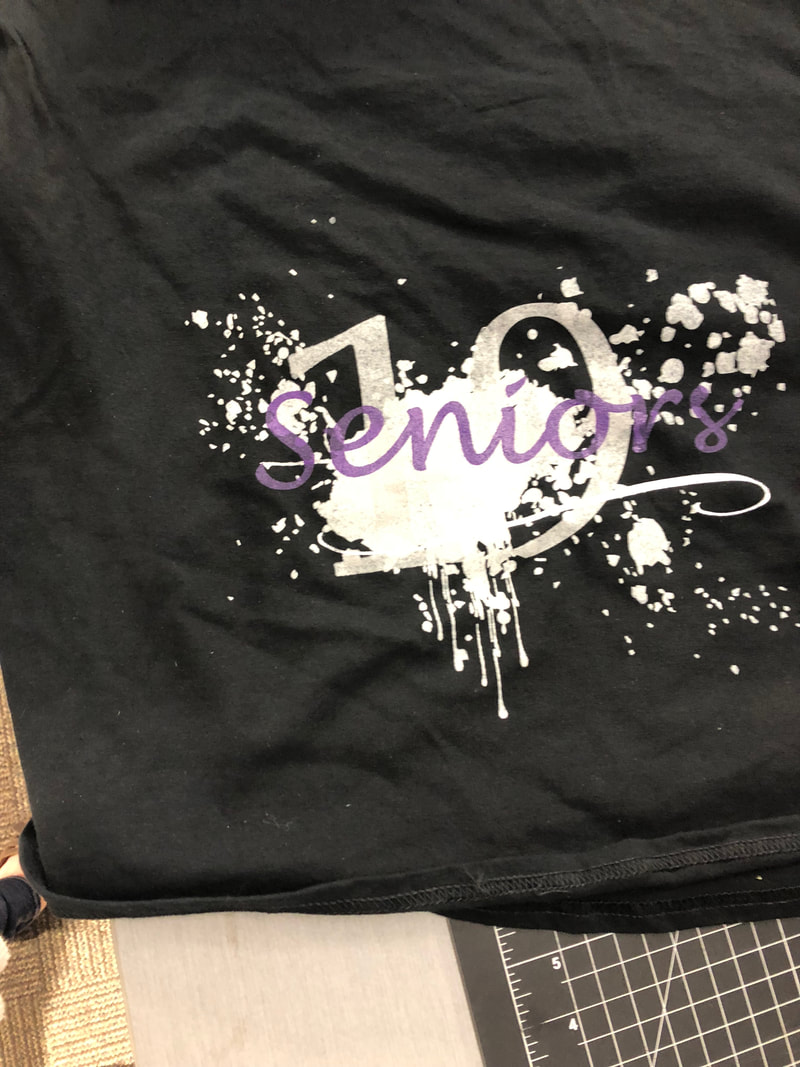
We all had to come up with design ideas for our screen printing t-shirt. The design had to be something we liked enough that we would wear. Also the design had to be relevant to us and important to us. First I thought of a gymnastics t-shirt, but I have about 50 of those, so sadly I don't think I need another one. Next I looked at possibly making a new Senior class t-shirt. And that's where I stopped
Making the design
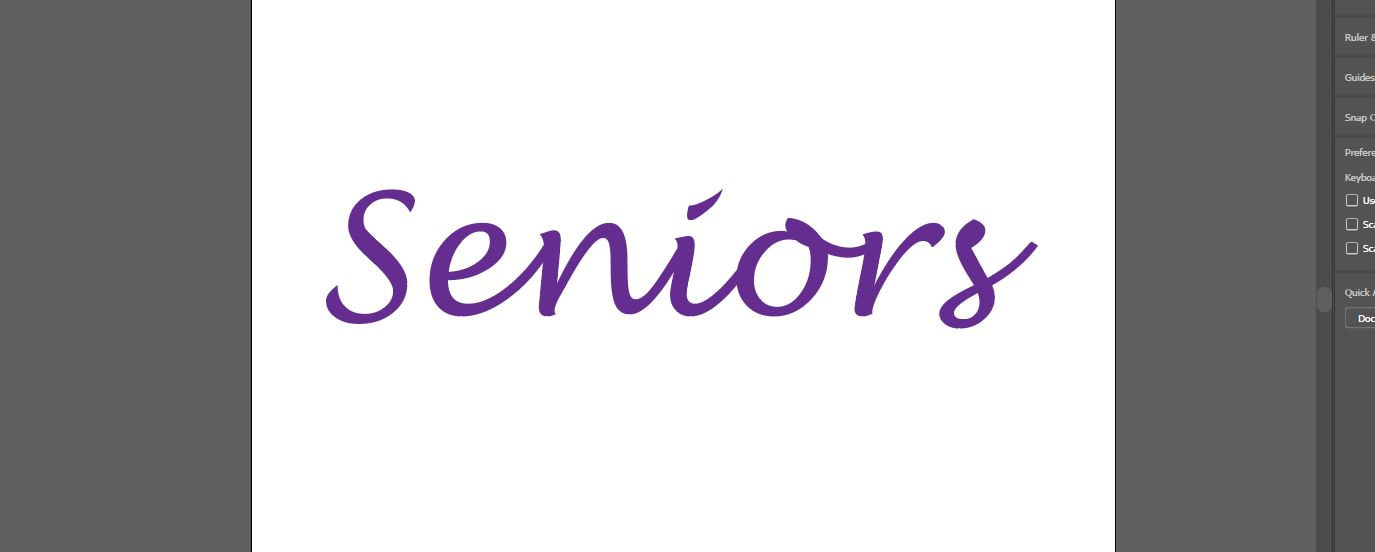
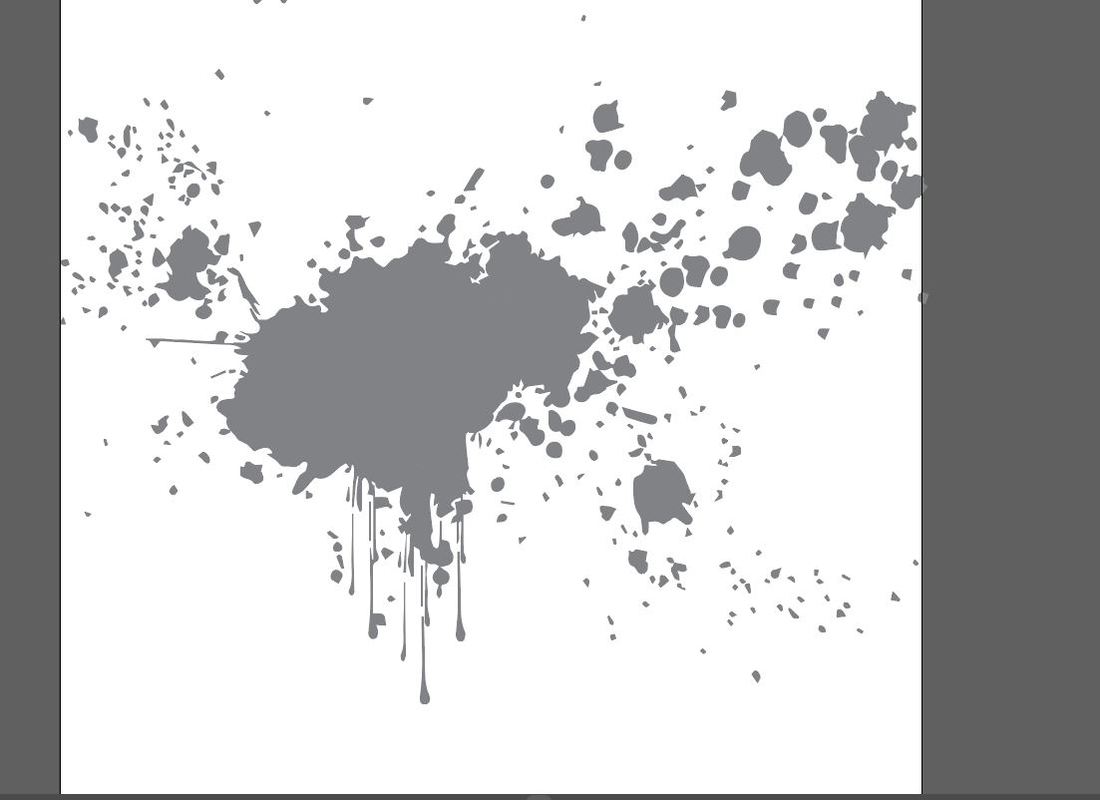
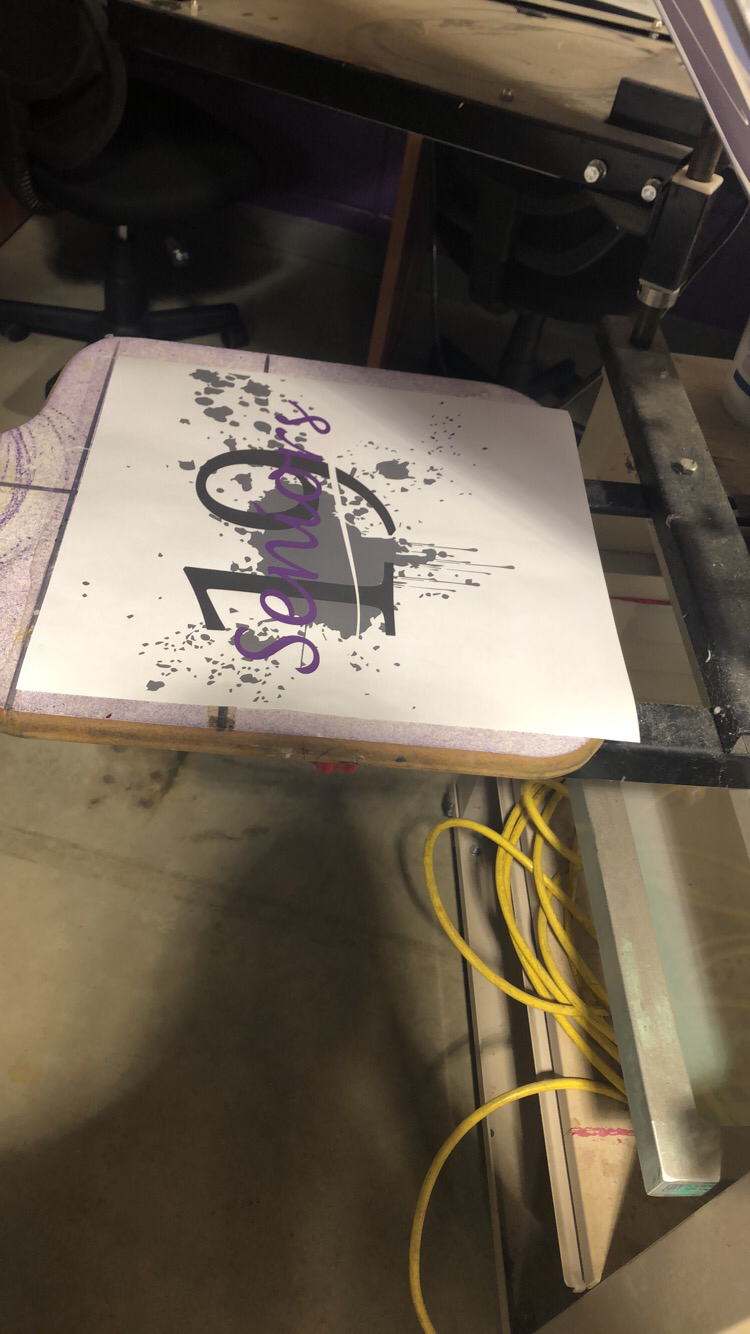
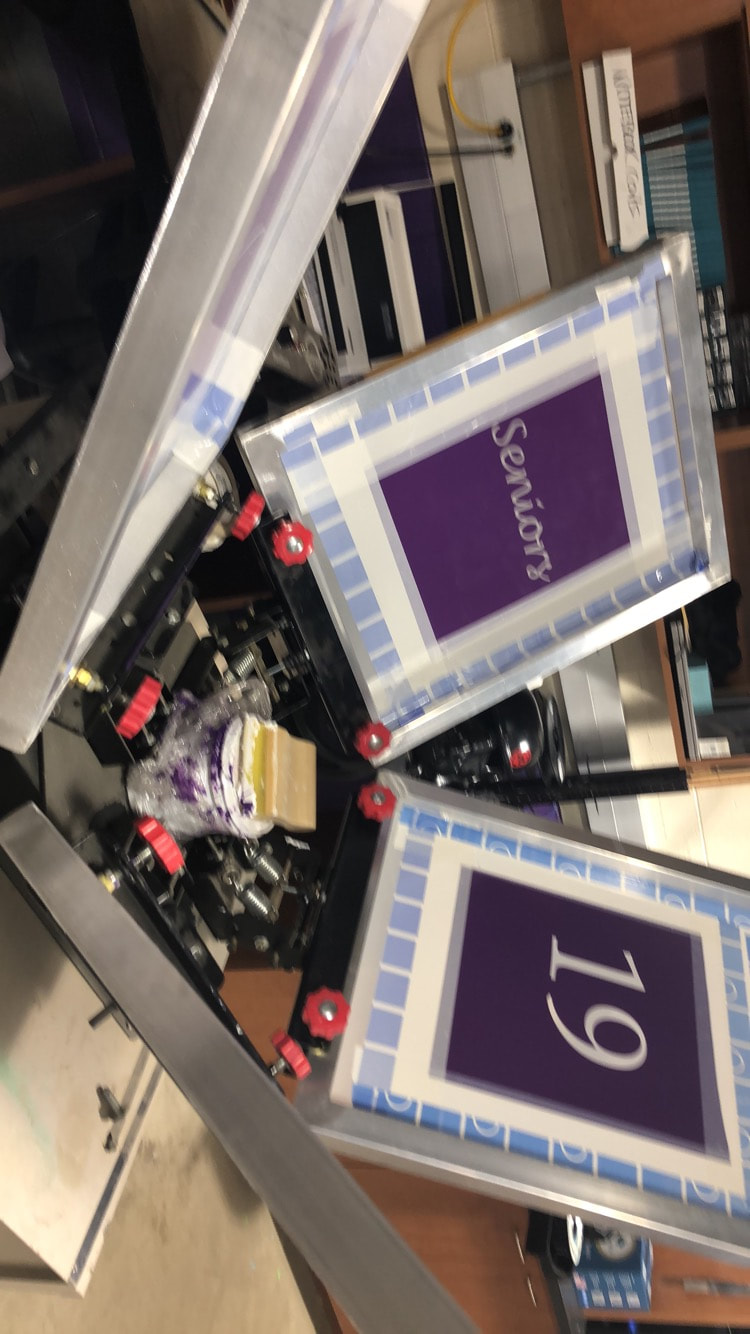
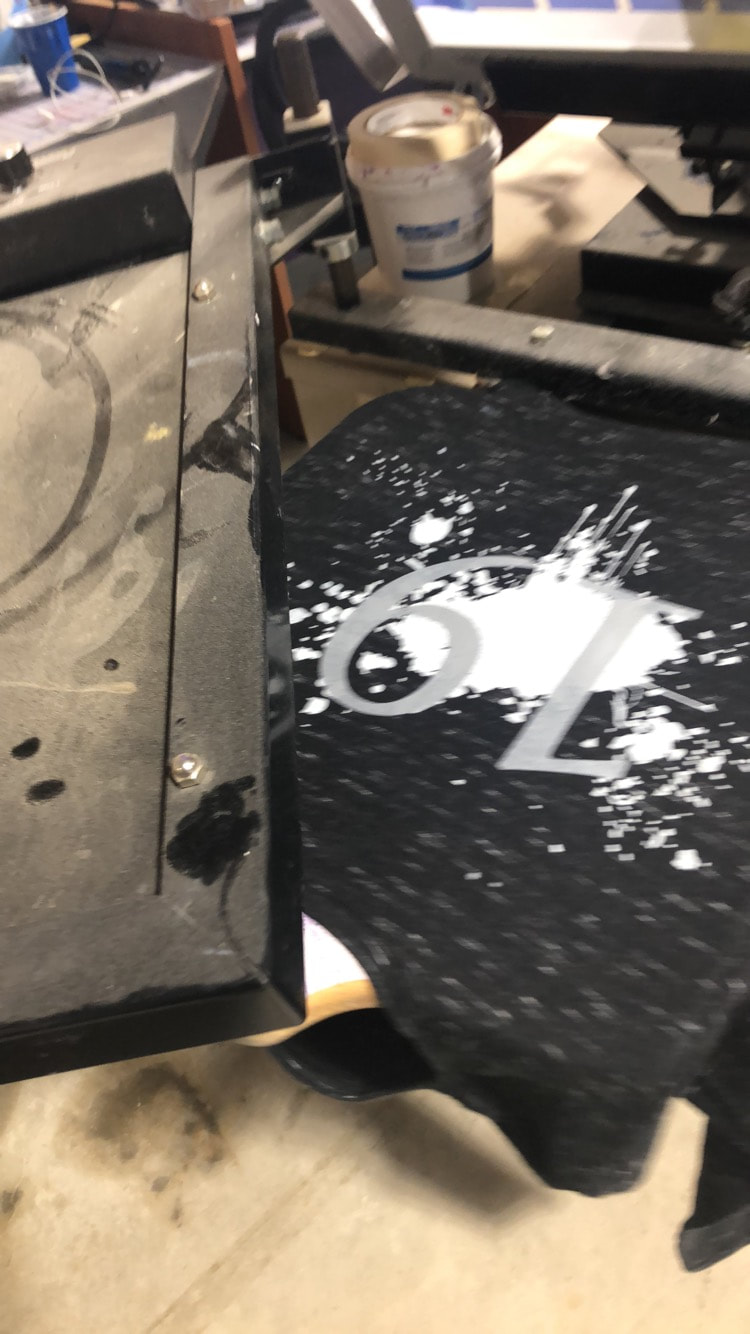
After picking the new senior idea I had printed out a blank t-shirt template to draw my ideas on it. I printed out a view of the front, back and side. Then I got to drawing. Once my drawing was finished I had to find the all of the pictures/ graphics and text I wanted. At first I wanted a chalk looked cloud which would look really cool except for the fact that it would be almost impossible to do off of vinyl. So I decided to go with a splatter paint, which still would be a little difficult but not as hard. I also picked to put a faded 19 in front of the splatter paint, but behind the rest of the text. Next writing out seniors and having the line underneath it. Since I needed to use 4 different colors, I needed to use 4 different elements. Once the design was all done and I had everything positioned, I need to get it onto separate layers to print it out. Making sure that the art board is 12" x 14"
Layer and printing |
|
|
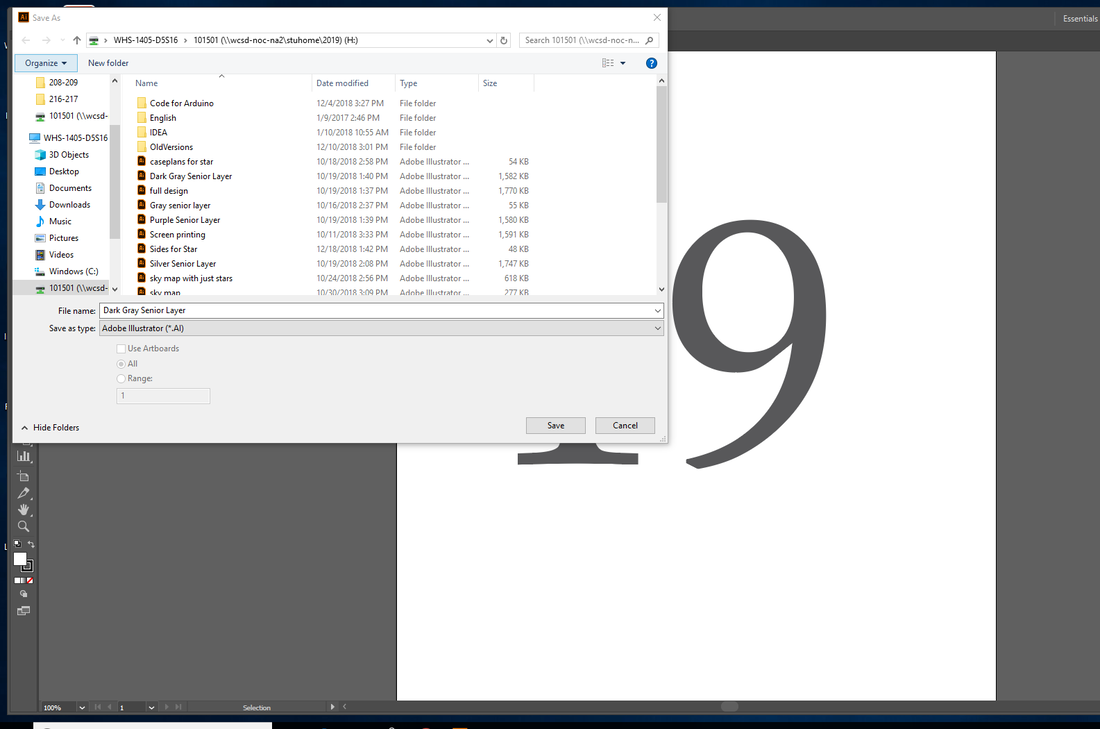
To print it out I first had to finish the final design and save that as the final design. Once that was done I moved on layer by layer having to open the final file in illustrator and then cut out everything I didn't want on that one layer and clicked save as once that was done and saved the file name as that color layer. I repeated this process until I had all four layer on their own and the final as well. Now that that was done I could vinyl cut the layers. First putting the flash drive in and then saving all 4 layer files onto the flash drive to print out. Next to vinyl we picked the roll that had the most vinyl on it and put the roll on the roller and then put in the flash drive opening up the files and clicking "cutting master 2" then "cut/plot" and making sure everything was lined up correctly and looked like what the final is supposed to look like, then pressed enter. Once all 4 layer were cut out, instead of weeding out what you didn't want, for this you have to weed out what you do want, since that will be what the ink goes through on the screen. Once that was all done, it was time to set up the screens.
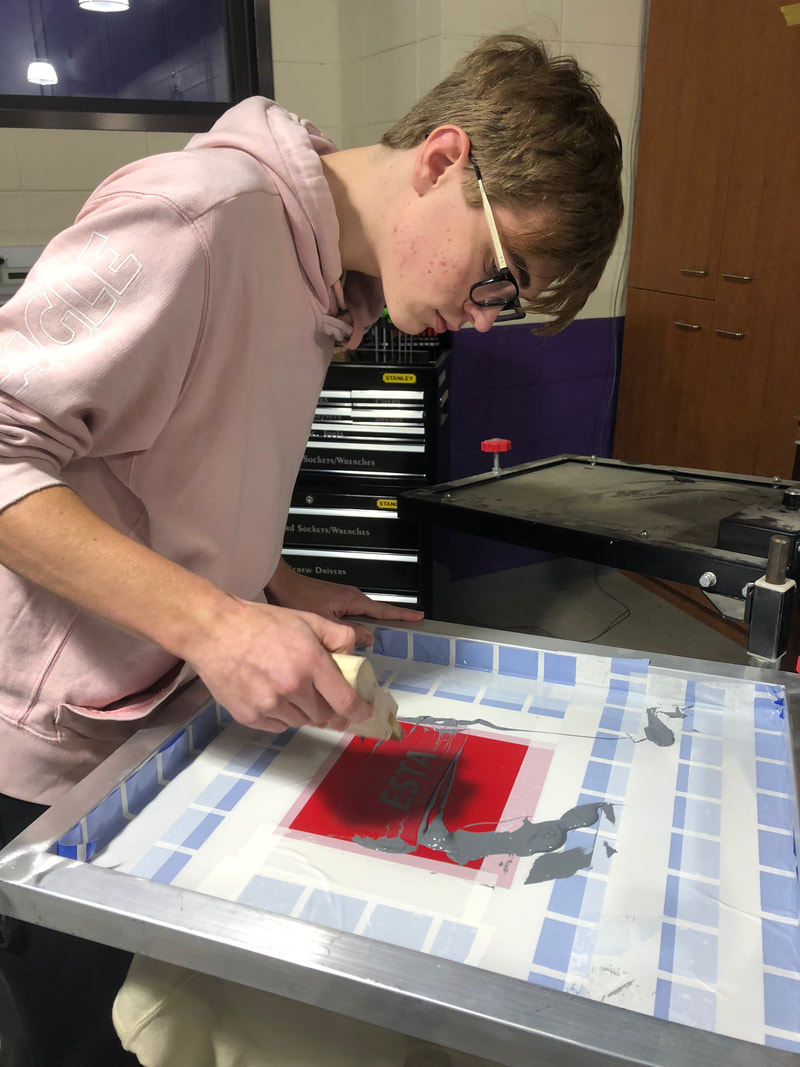
screens and Ink
|
|
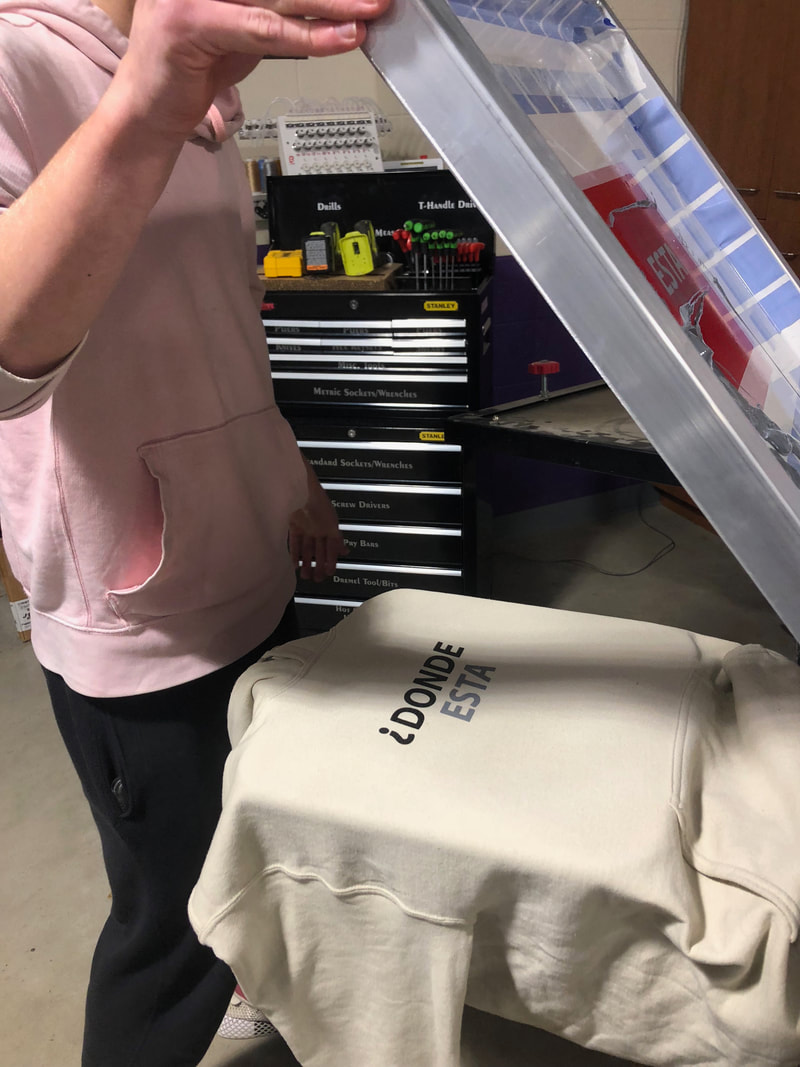
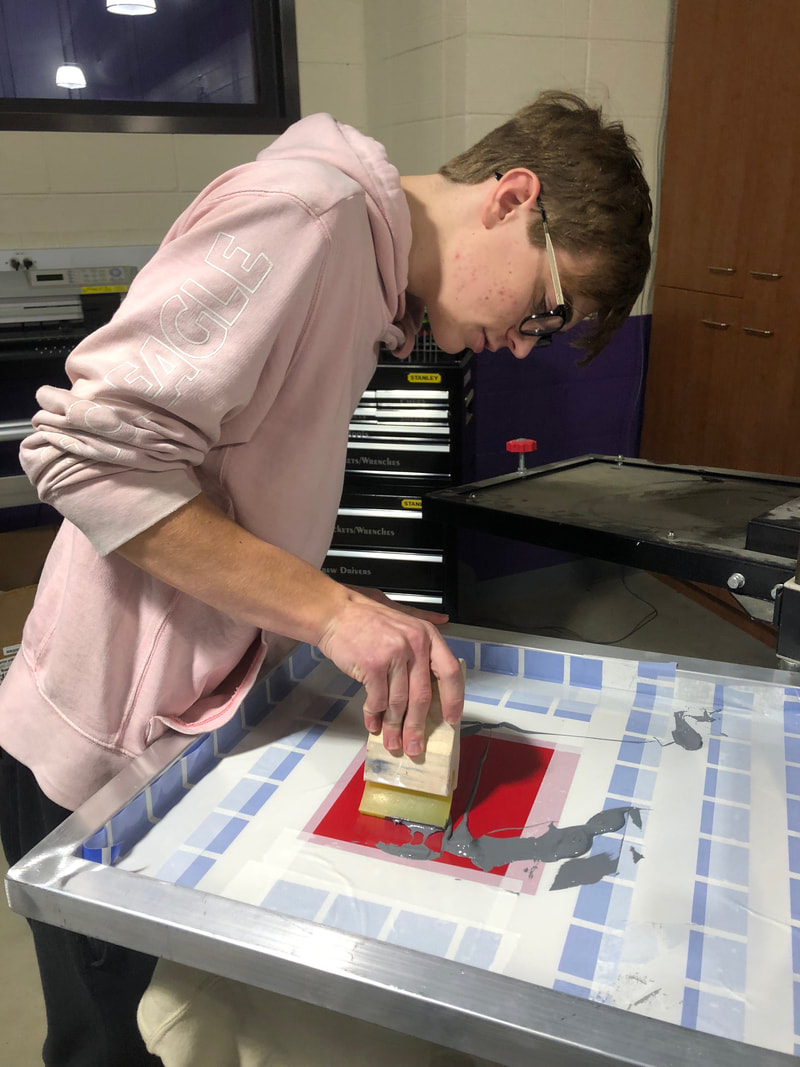
Collect all 4 of the screens you will need for this specific project. Also collect all four or more, if your mixing colors, of the inks you will be using. Grab your vinyl with the tape on them, take the vinyl off of the sheet and place in the center of the screen. Grab tape with blue on half and white/clear on the other side. Tape all over the vinyl and on the vinyl in about a 1/2". Make sure the tape is covering everything and vinyl is on the screen with no holes besides what the ink is going through. To set up the screens in the XXXXXX and make sure you have a print out of the complete design to place on the wood. Set each screen up hammering lightly if needed and making sure that you don't screw the bolts into the screen too far. Once all four screens are set up correctly, grab your ink and place the ink on the bottom or side of the vinyl. Make sure the ink is on the correct screen and use a squeegee to "scrape" the ink across the open design on the vinyl for all 4. Making sure you use the hot plate over top of each layer to completely dry it. Once all done place on the heated conveyor belt to completely dry your final design.
|
|
Reflection
In this project I learned how to put vinyl on a screen and how tricky that ends up being and learned how to tape everything up and know why you have to tape it. I also learned how hard you have to press on the ink with the squeegee in order to get the best most vibrant color result on the fabric. Lastly I learned how fast it can go if you don't get too frustrated with lining everything up, because that part takes the longest.
