Final project
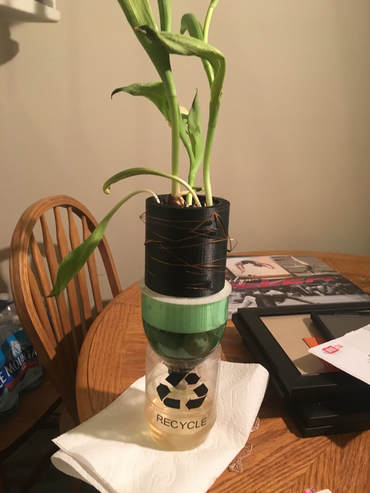
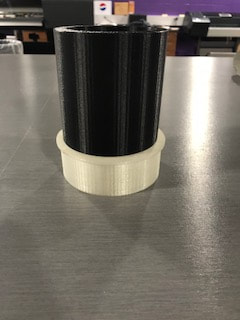
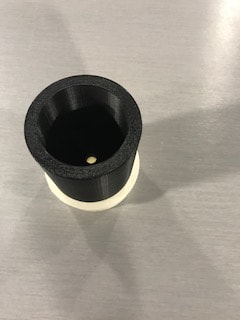
For the final project, I partnered up with Alyssa and found way to reuse water. When watering plants there is usually a dish under it that catches the extra water, but usually we waste that water. so we decided to connect a pot, containing a plant, to a filter containing rock and sand and a cloth. The water is filtered from the soil, and the filtered water flows into a jar, so it can later be reused. In order to complete this task we had to use the innovation center and so we 3D printed a pot using Inventor. We also 3D printed an insert to connect the pot to the plastic bottle. Then the filter was put on from a plastic 2 liter bottle. We placed the pot, insert, and filter in a jar for the water to flow into. The water collected in this jar can be recycled, and used to put back in the plant or to drink.
Alyssa's Part
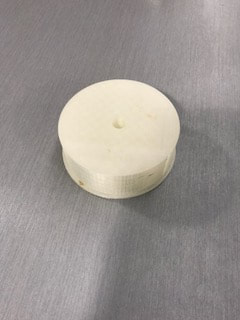
Alyssa had to 3D print a pot and an insert to be able to put the plant in and put the pot into the plastic bottle. we had to super glue the prints together.
My part
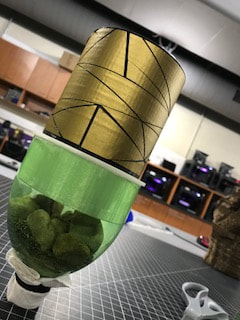
To make the vinyl for the pot, Alyssa and I chose an image off of the internet and decided on a couple to use in Illustrator. Once we picked our favorite I saved the image, and opened it up in Illustrator. Then, I enhanced the image, and traced it. I had to do this on a couple just in case some lines didn't show up we needed a plan B or C. I saved the file, and opened it up on the vinyl cutter. I placed the gold roll in the vinyl cutter, and cut out the image. Once Alyssa's was cut out, I cut out mine.
Using a dental tool, I took away the extra vinyl scraps, and applied application tape to the vinyl. Once ready I applied the vinyl to the pot using application tape and a squeegee.
Our Part/ My part
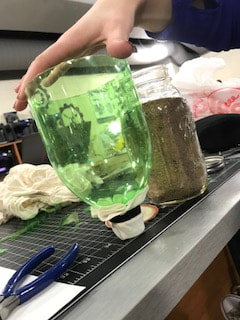
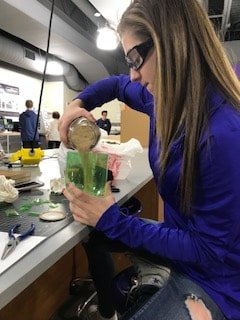
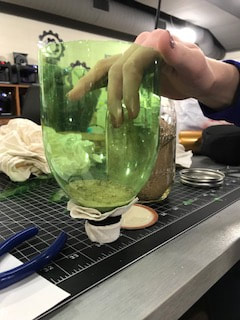
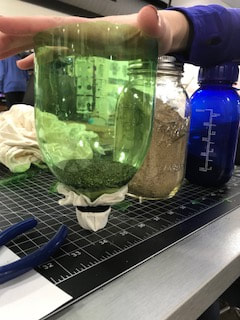
Next, we tested the filter before we connected it to the rest of the project just in case it didn't work. We put a cloth at the bottom of the bottle with a rubber band, put in two layers of sand, and a layer of rocks. This originally took 4 trials to figure out the right amount of sand what kind of sand and how easily it would work. Then we put water in the bottle to make sure water could flow through the filter. First it was drops then a steady stream then a steady stream of drips.
Next, we took the top off of a peanut butter jar since we didn't need the cap, and cut off the thicker part of the jar that the cap screws onto. We placed the bottle in the jar making sure it was still stable, so we would be able to remove the jar later to reuse the water.
To decorate the jar and to use another piece of machinery in the innovation center, we took the recycle symbol and put it in Illustrator to be cut. After opening the image in Illustrator, we expanded the image and traced it making sure it still worked. Then we uploaded it onto the flash drive to be loaded into the vinyl cut.
Next, we uploaded the file in the lab to be cut out by the vinyl cutter. After choosing matte black since it was going on the jar, we cut it out. Using dental tools, squeegees, and application tape, the usual vinyl supplies, the recycle symbol was ready to be placed on the jar. We had placed it on the jars.
After the symbol was put on the jar, all of the pieces were put together. Finally, we planted flowers in the pots to finish our project.

What I learned
I learned many new tools and that vinyls don't really stick well to 3D prints since they are nonporous. We had to figure out how to make it work. We also figured out that some prints don't work very well, our first time printing the inserts one of them became warped which sadly doesn't work when you need a tight seal, so we had to print a new one. I also learned how to make a filter out of rocks sand a plastic bottle and a cloth.